EXPOSURE TRIANGLE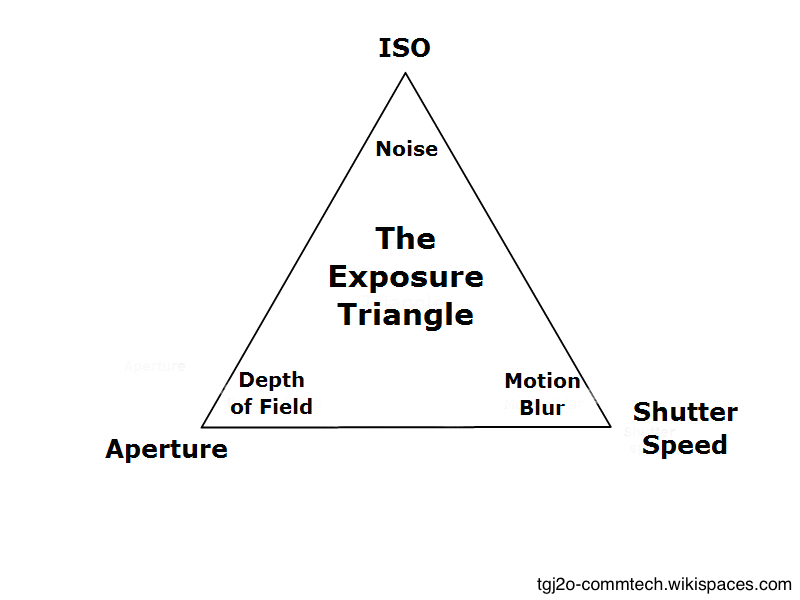
So far we've covered Aperture, Shutter Speed and ISO individually, but together, they come into one when it comes to photography. The Manual setting on your camera gives you the ability to change the ISO, Shutter Speed, and Aperture. This is the only setting that can do this. If you correctly use all the settings together, you will get a great quality, noiseless, clear, and crisp image. This is called the Exposure Triangle. Using Manual mode is a great skill to learn but in order to obtain the knowledge and skill, you need lots of practise and precision. You must know about Aperture, Shutter Speed and ISO singularly. Just think of a triangle, at each 3 points, there is Shutter Speed, Aperture, and ISO. Together they create the Exposure triangle. Altering one of them results in a completely different picture to how you may have wanted it to turn out to be. The most important thing to know when dealing with these altogether is: Different combinations = different outcomes in the image layout and quality. However, if your scenario is a bird flying across the sky, then you want your shutter speed to be faster, so that you can capture the bird in flight, instead of it all being a blur. By having a faster shutter speed, the shutter moves quicker to enable a moving object to be captured with little to no blur of the subject (depending on how steady your arm is!) However, increasing the shutter speed makes the photo darker, thus you must also make the aperture hole large and the ISO slightly higher. The Manual setting on your camera gives you the ability to change the ISO, Shutter Speed, and Aperture. This is the only setting that can do this. Think of it as a triangle. The ‘manual’ triangle. Take into account ISO, Aperture and Shutter Speed, to get the perfect lighting, contrast and depth of field in your picture. If you correctly use all the settings together, you will get a great quality, clear, and crisp image. The purpose of manual mode, as opposed to automatic mode, is that you have full control over your photos. Instead of your camera predicting how you want it to be, having small mistakes and imperfections, you can customise it to exactly how you want it to be. There is no perfect combination of settings for every scenario; you must change and re assess every time you change lighting or subject. Sure, you can find the best combination for the surroundings you are taking pictures of, however, there is not just one combination that does all. For example, you can’t have a dim lit surrounding and then put your ISO low as well. This results in an underexposed picture. Low ISO, fast shutter speed, small aperture opening = great landscapes for daytime Medium ISO, slow shutter speed, large aperture opening, exposure compensation -2.5 = great night landscape Examples: Medium ISO, fast shutter speed, large aperture hole = shallow DOF (macro) photography This particular combination is perfect for macro photography, as the medium ISO will keep the quality of the picture allowing as much quality and sharpness into your picture. The fast shutter speed will entitle you to no motion blur and a crisp image. And finally a large aperture hole gives you a shallow depth of field and allowing as much light as possible into the camera sensor, altogether resulting in perfect macro (close up) photography and also portrait photography. All in all, try some of the scenarios, have a play around with your DSLR, as with practice, you can master the act of shooting in Manual mode. |
